How tweaking email headers can grow your newsletter
How to use email headers to consolidate your audience, build a community, and highlight your paid offers.
The header is the very first thing that subscribers see when they open your emails. Think of it as a little like your virtual welcome mat.
Substack allows you to add custom headers to every email you send. You can set and forget, or you can tinker around and change the format depending on what’s going live that day.
Headers can do a range of different things too, depending on your preferences. Build trust, remind readers who you are, upsell a paid subscription or product, or just set the tone for your writing.
Done well, it’s a way to enhance your newsletter, strengthen your audience, community or even increase revenue.
Why do headers matter?
Email headers make your work look consistent and professional, even if you set it and leave alone for a while. It’s not something you have to modify constantly, though you can do that depending on whatever content you’re sending out at that moment.
I’m a strong believer that it’s worth taking the time to refine your email header, and ensure that it looks professional, as well as offering value (always send yourself a test email to check it all works).
It’s not necessary, but it can be useful. And remember: you really don’t have to use it as a chance to sell or prompt readers to spend money. It really can be as simple as a sentence or two reminder of what you’re writing about.
Get this part right and your emails start off on the right foot, and grow your newsletter in ways that can be hard to define with metrics.
Step-by-step guide to changing email headers
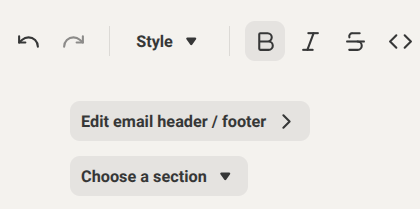
Note: Rather than going through publication settings, you can always change the header at the top of your draft post, as pictured below.
You’ll most likely edit your header inside your publication settings, however.
Head to your dashboard and click ‘Settings’. Then scroll to ‘Content’ or select ‘Emails’ from underneath this section in the sidebar menu.
In this section, you’ll see the options below. We need ‘Email header & footer’.
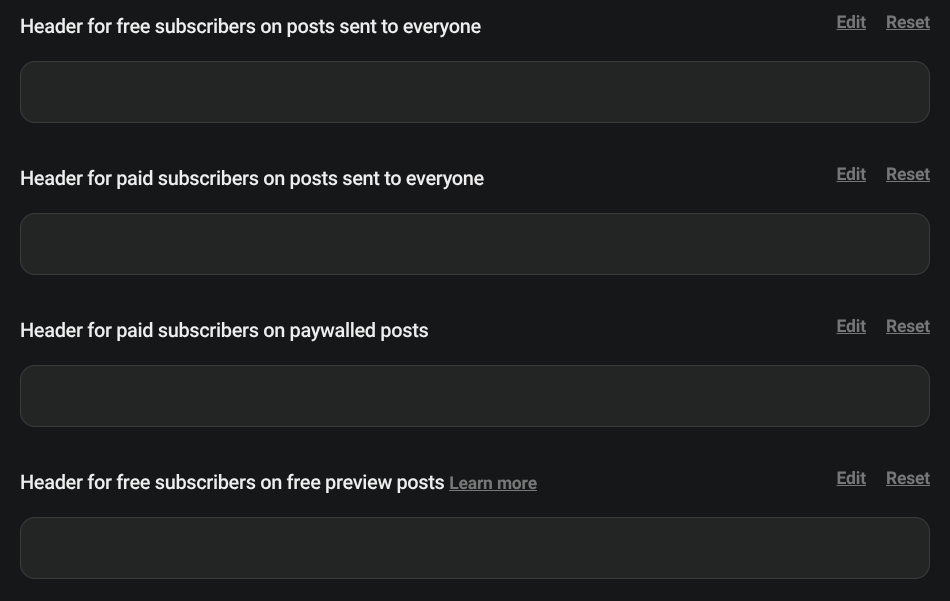
When you click ‘Edit’, you’ll be greeted with four options for headers. You can change how they look for free and paid subscribers (if you have paid turned on), and whether the post itself is free, a free preview, or paid-only.
This gives you lots of flexibility, as you can have four completely different email headers depending on what you’re looking to send out at any given time.
That’s all there is to it. Five minutes of setup and you’ve made every future email more polished.
What next?
Treat the email header as a small but steady signal that this is a real publication. Set it up once and it works every time you hit send. Sometimes that’s better that than leaving a blank space at the top of your emails.
Get this right and you’ll start every issue with confidence.
In Monday’s post, I’m going to be sharing a collection of email header templates for paid subscribers to use - ones that have really worked to consolidate my audience and helped grow my newsletter revenue.
Stay tuned!


